The BeamNG.drive World Editor
Please note that this blog post conforms to BeamNG.drive version 0.33.3, released October 7, 2024.
It’s a common question from players of the driving game BeamNG.drive: how do you record a vehicle’s path and save it so that it can be replayed later, perhaps for use in a realistic car crash compilation or out-of-control road rage incident?
The answer is actually quite simple. Since the earliest versions of the game, the Script AI Manager, in the World Editor has allowed players to record vehicle paths, save them to disk, replay them, and create multiple recordings at once. This is just one feature of the many that the World Editor offers, and I suggest you explore its multifaceted capabilities if you want to level up your gameplay experience.
The following steps are all that’s needed to get started recording vehicle paths. I’ll also offer some tips at the end of the blog for better recording.
Step One: Open the World Editor in Freeroam
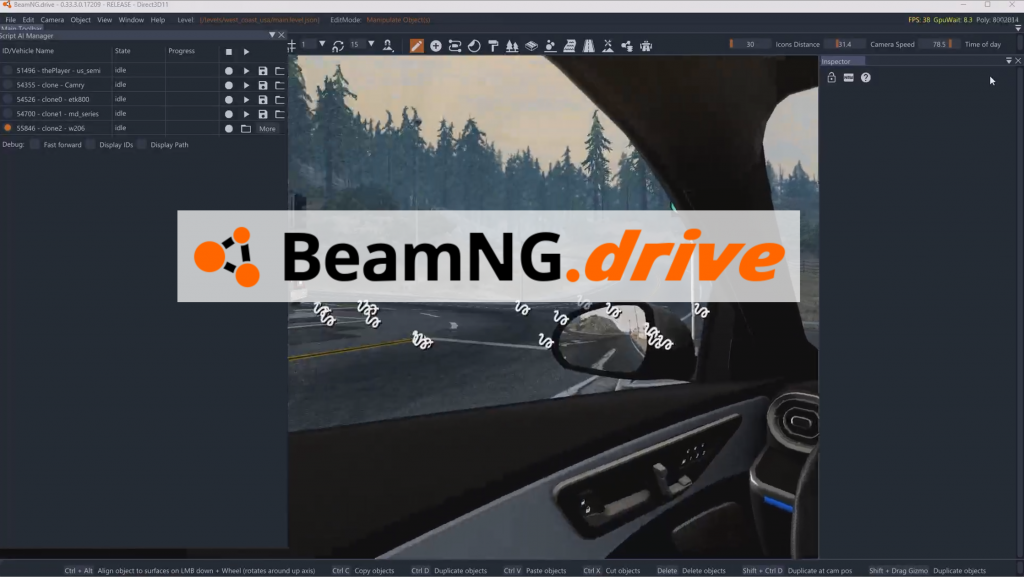
To begin, spawn as any vehicle and in any map, in the Freeroam mode. Once everything has loaded, press F11 to launch the World Editor, or Alt+Enter if the game is in fullscreen mode. A small dialog box will pop up onscreen, saying “Launching World Editor”. In a few moments, the World Editor will have launched (see below), complete with an array of buttons and panels.
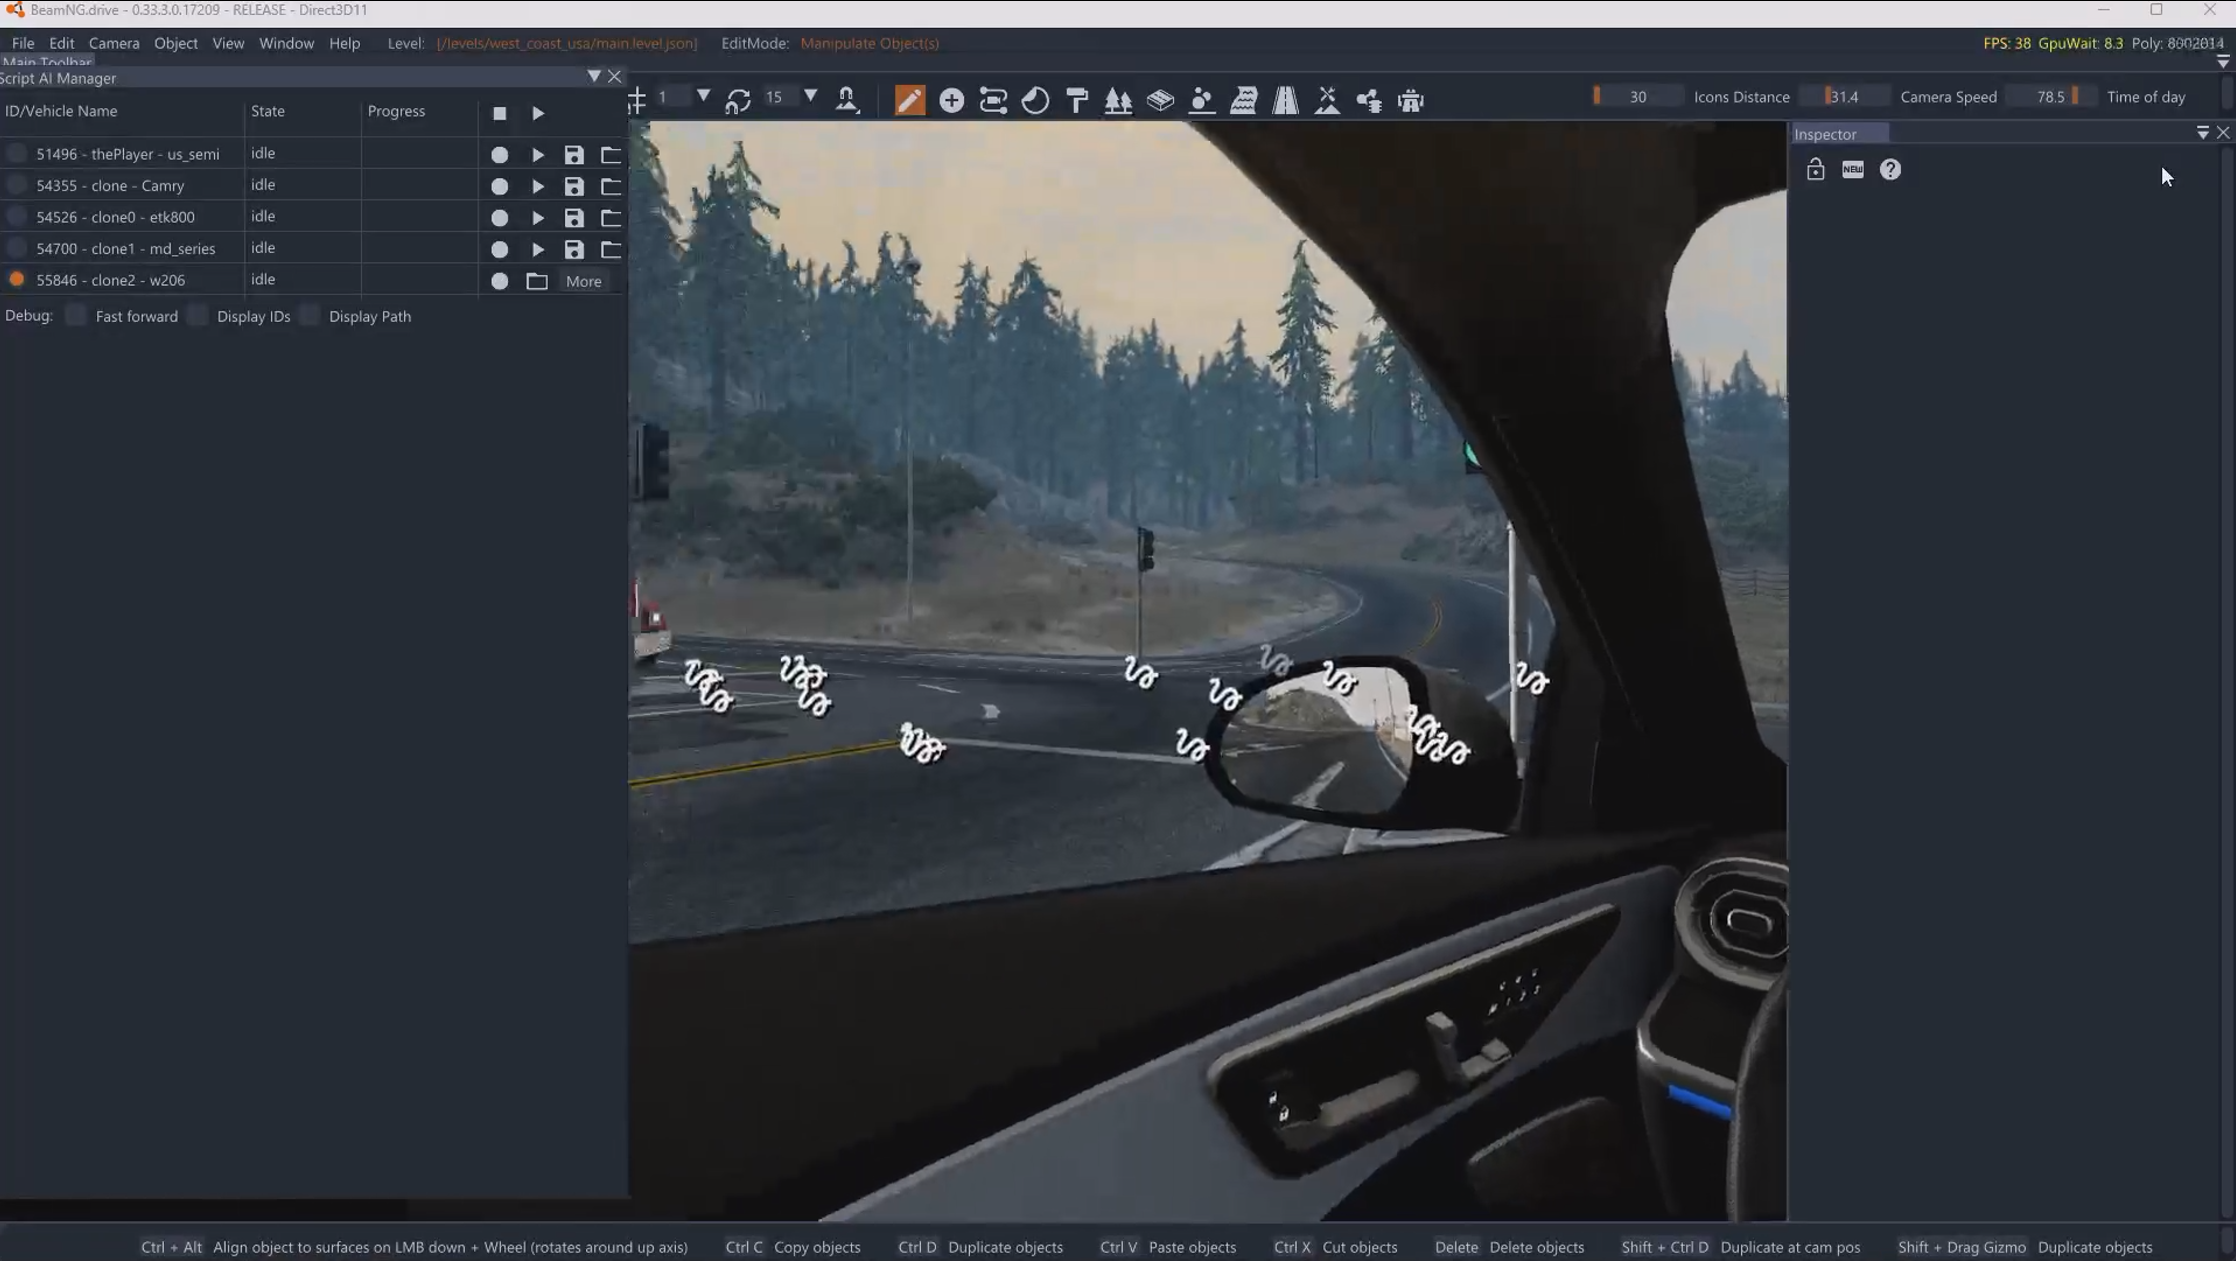
Once you have launched the World Editor, it’s time to move onto the next step: launching the Script AI Manager to start recording.
Step Two: Open the Script AI Manager
To get started recording, you’ll need to open the Script AI Manager in the World Editor, which can be done by going to the Window menu, hovering over Gameplay, and clicking Script AI Manager. (shown below). Once it is open, make sure you have selected the vehicle you want to record (the current vehicle’s dot on the left of its name will be filled with orange), select the camera view you want to drive the vehicle in (by pressing the C key), and press the Record button (white circle) next to your current vehicle to start recording. From there, all you have to do is start driving the vehicle–and don’t forget to hit the Stop button when you’ve finished to save the recording.
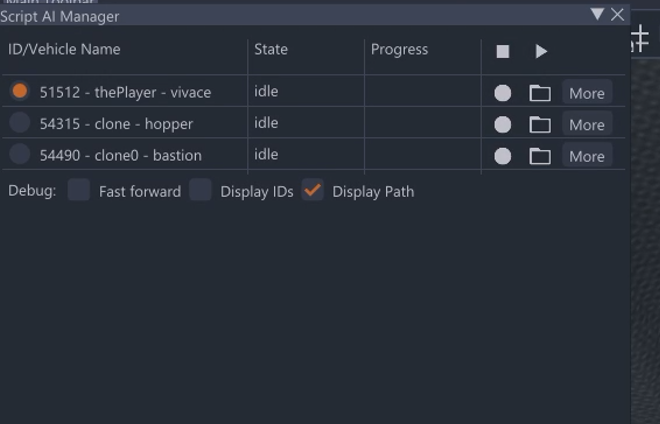
You have a few options for configuring your Script AI Manager experience. First, you can check the “Fast forward” box to replay your recordings at high speed, although you probably won’t need to use that option very often. Next, there’s the “Display IDs” box, which you probably also won’t need to use regularly. Basically, it shows the vehicle’s ID (51512 for the vivace in the above screenshot) in the world, rather than in the editor only. Finally, there’s the “Display Path” box, which shows a colored path depicting the route you drove your vehicle on, that changes color corresponding to each vehicle. I usually like to leave this on while setting things up and recording so I know what each of my vehicles is doing, but once everything’s finished I typically turn it off to save performance, and to reduce clutter on the screen.
Once you have finished driving and recording your vehicle, you have the option to save your recording by clicking on the folder icon (second button from the left in the Script AI Manager), typing in a name for your recording, and saving it to disk. Then, you can access that recording later, no matter what vehicle, world, or map you’re in. These recordings also port to new minor versions of the game. So while BeamNG.drive saves recordings temporarily (for the length of your gameplay session, or until the game is closed) if you just hit the “Stop” button when you’re done without fully saving it, you’ll want to save recordings to disk using the above method if you really want to be safe.
The gray “More” button displays a list of your saved recordings for you to access. Please note that if you’re applying a recording made with a faster car to a much slower car, the recording results will differ! For best results, use the same vehicle when replaying recordings as you used when recording it the first time.
That’s pretty much all there is to the Script AI Manager. To play all vehicles at once, hit the Play button at the top of the window. The same goes for the Record button. There’s also a “Restart Replay” button (not shown above) that will show up if the Script AI Manager window is large enough, and that allows you to restart the replay of another vehicle without having to first stop it and then play it again. Additionally, when a vehicle’s recording is playing, a multicolored progress bar will show up in the Progress column of the window, showing you how far it is through the recording. When a vehicle is recording, its status will change to “recording”, and when it is playing, its status will change to “playing”. When nothing is happening with that vehicle–you’re just at a stop–it will display “idle”, as in the above screenshot.
Script AI Manager Tips, Tricks, and Cautions
Make sure you have a plan for your vehicles before you start recording.
If you’re fumbling around on the road while recording, that wastes a lot of time, since you have to reset your vehicle and the recording if you make a mistake. Have a set plan for how your vehicle is going to drive so that all you have to do is complete the drive when you go to record it. This saves a lot of time and energy.
Set the vehicle’s respawn point as close as possible to your recording’s start point.
If you have to drive your vehicle all the way from the point you loaded the game at (e.g., Chinatown in the West Coast map) to the starting point of your recording, that also wastes a lot of time. To mitigate this, open the Radial Menu (press esc), and click through settings until you find the button that says “Set Respawn Point”. For a quicker method, simply press the Control+R combination when you’re vehicle is at the desired respawn location.
Getting the timing right for all of your vehicles will be hard.
Not all of your recordings will be perfect. You might have a few seconds of inactive time at the beginning of your recording. Even the slightest factors can throw off the timing of your entire setup. You could have vehicles crashing into each other or the nature of your setup could be completely messed up because one vehicle started too late or too early. There isn’t really a surefire way to prevent this kind of thing from happening, except to make sure that you try to start all vehicle recordings as close together as possible (or by using the “Play all” button), and to make sure that when you record vehicles, you start driving immediately (without any lead-up inactivity).
Identify the order in which you need to record your vehicles.
If you are setting up for a recording session with multiple vehicles, make sure you know the order in which you must record your vehicles. Otherwise, you’ll have vehicles crashing into each other and other unfortunate disasters because vehicles are hitting other vehicles that weren’t there when you originally made the recordings.
The first vehicle you record should always be the one that’s going to be in front of all the other ones. For example, if you have a car pulling out of an intersection in front of a pile of other vehicles, you should record the car pulling out first. Then record the vehicle at the front of the pile of other vehicles, and then work backwards from there. This way, when you record subsequent vehicles, there will always be the same assortment of vehicles in front of you as there will be when you replay the entire thing.
Be aware of your computer’s limits.
The more vehicles you add and record, the more computing power will be used by the game. BeamNG.drive is a very memory-intensive game, although having a good CPU also helps. While it is recommended that you have 32 GB for the ultimate performance, anything more than 8GB is all right. However, the more memory you have, the more vehicles you can add and record before the game starts to lag. If things get choppy and your framerate dips, it’s probably time to stop recording vehicles. The average machine that’s less than 5 years old will be able to record and play up to eight or ten vehicles simultaneously, with AI traffic turned off, in a built-in map.
You may want to turn off AI traffic before recording.
Unless you are an expert gamer and have mods installed to regulate AI traffic, you’re likely going to want to turn off AI traffic using the Radial Menu (click Traffic, then “Delete all traffic vehicles”) so that you don’t run into traffic vehicles while recording, and that vehicles replaying don’t run into new traffic vehicles that weren’t there when you were recording the first time. The AI will just get in the way if you’re trying to work out a complex scenario anyway, and it will be easier on your computer as well in terms of performance and lag.
Conclusion
In this blog post, the method for recording the paths of vehicles using the Script AI Manager in BeamNG.drive was discussed. Using these techniques, you’ll be able to simulate car crashes, road rage incidents, races, and much more. If you have any further questions or comments, feel free to post them in the Comments section below. Happy driving!

